

In this post I will cover your camera settings and the exposure triangle. We will look at Shutter Speed, Aperture and ISO. This is more of a beginners guide so if your already shooting in manual mode please use the comments and offer some extra guidance and support for those still learning.
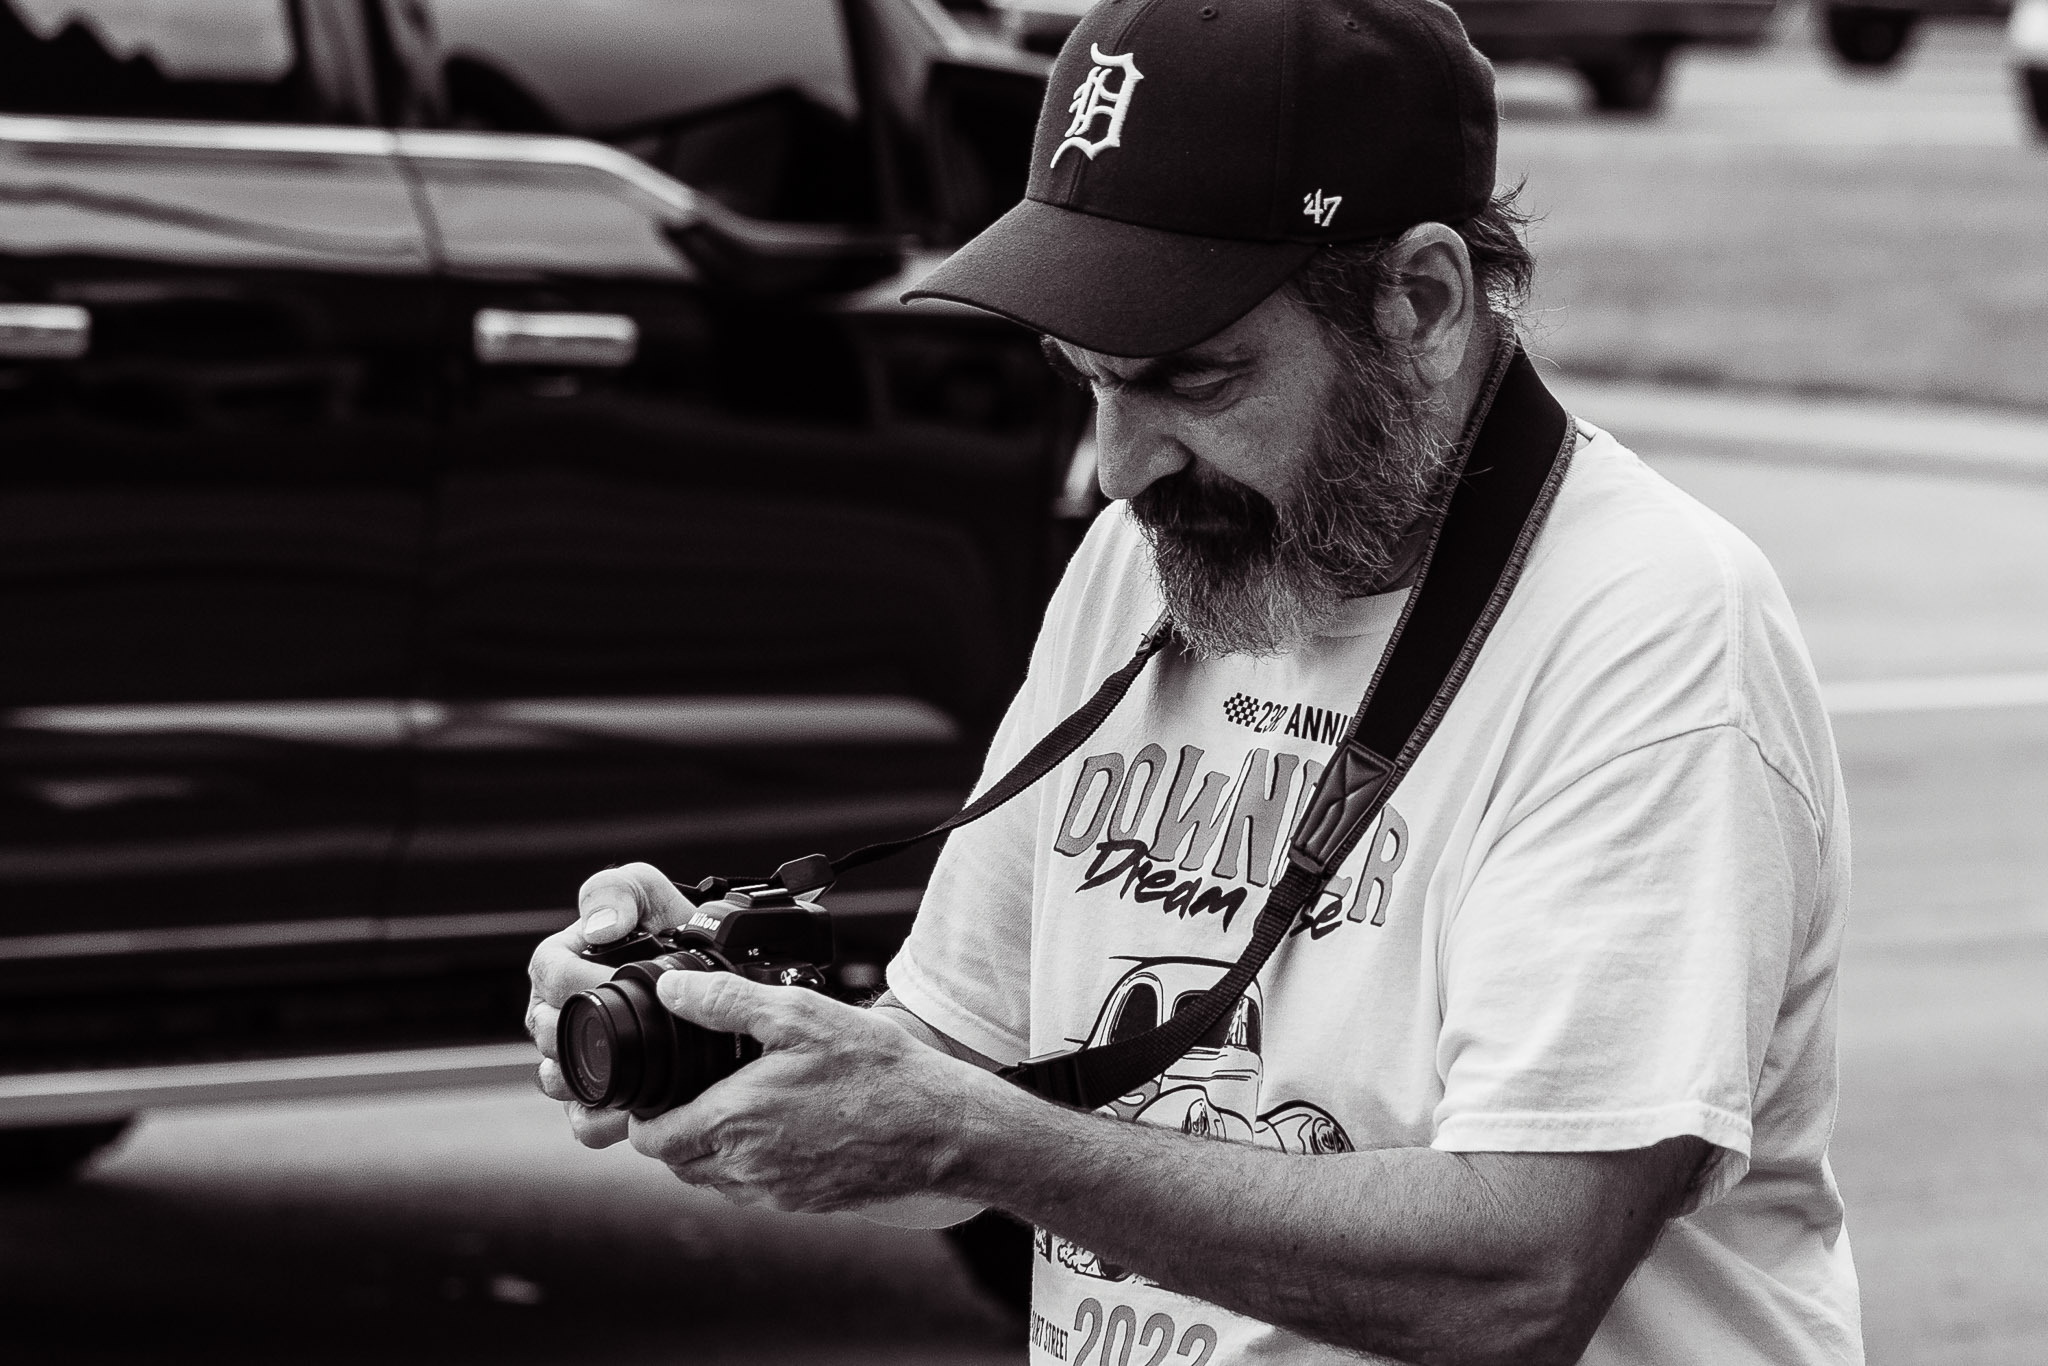
Most of us, as photographers, run into other photographers while out and about shooting. If you have a DSLR or Mirrorless in your hands these encounters usually lead to one inevitable question, “what are you shooting?”
No, they don’t mean what am I pointing my camera at! They mean, what camera am I using, what lens? Is it a Sony, Nikon, or Canon? Full frame? How much? Is mine better than yours? Why, because holding a DSLR or Mirrorless means you’re serious. You want to take good pictures. Otherwise, you would just be holding your phone right.
So, you are all serious and ready to take some great photos, but for some reason, you have your expensive DSLR camera set to “P” mode! Even worse, you might have it set to that green little camera symbol designated “Full Auto”.
Let’s change that. Today, from here on out, you’re going full JEDI. You are going to learn to shoot in manual mode and become one with your camera.
Say it, “I am a Jedi. I’m one with my Camera, and my Camera will guide me.” – Ganodi… well, sort of.
Knowing Your Camera
Just as Luke had to learn how to control the force, you will need to learn how to control your camera. Just holding an expensive camera in your hands will not magically make your pictures awesome. You need to know your camera inside and out.
The same is true for your iPhone or Android device. Often, these are the only cameras at your disposal and the best camera becomes the one you have in your hands. Not to mention, the cameras on these phones are just becoming so good. Moreover, the camera apps are offering more and more control, even RAW capability.
So what is the Best way to get to know your Camera?
Should you sit down and go over the manual top to bottom six or seven times. Probably not, I mean sure, a brief overview or a quick once over is great, but the best way is to get out there and shoot, shoot, shoot!
You might take a hundred pictures, maybe even a thousand. Out of all those photos, you might come home, look at them, and think to yourself, “eck, only two good ones!” That is OK! Every time you are out there shooting, you are improving your skills.
You are getting to know your camera and you are starting to familiarize yourself with the controls. This way, when that moment comes for a great photo opportunity, you will be ready! You won’t be fumbling around trying to remember how to adjust the aperture or shutter speed, it will be instinct!
Best Books for Photography
Know your Light

“Close your eyes. Feel it. The light…it’s always been there. It will guide you.” – Maz Kanata
The sooner you realize that great photos are all about lighting and adjusting your camera accordingly, the sooner you will be out and about taking great photos. Lighting is everything in photography and it can make or break a photo.
What is the Exposure Triangle and what Camera Settings Control Light?
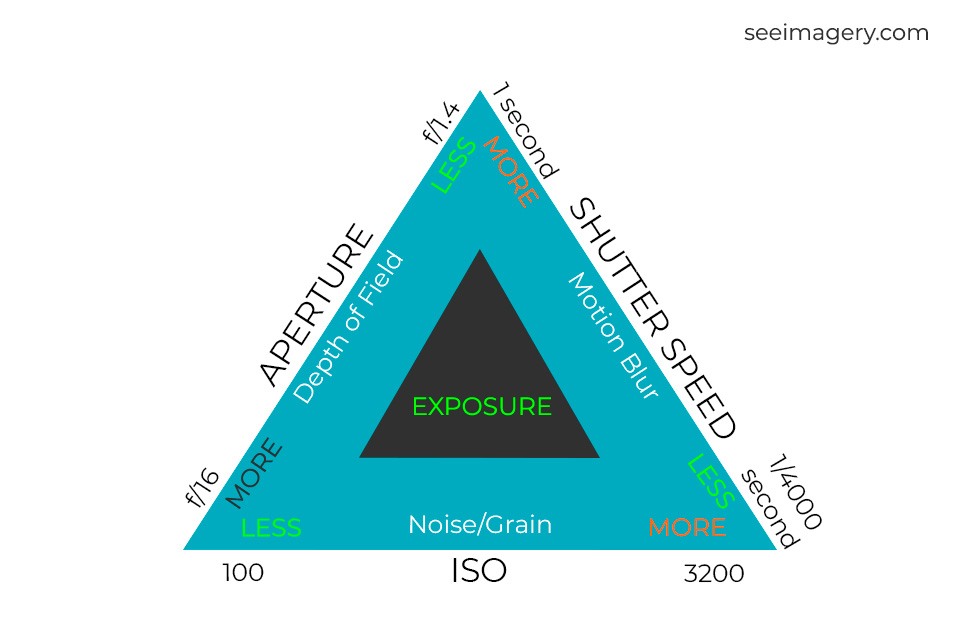
The Exposure Triangle consists of three fundamental variables that affect exposure. They are Aperture, Shutter Speed, and ISO. These are the three components to consider before clicking the shutter release on your camera. Ultimately, they will determine a balanced and proper exposure.
These three camera settings make up the Exposure Triangle. It’s absolutely crucial that you understand their relationship with light and how they can affect your exposure. The illustration below helps to show this relationship.
Shutter Speed
How long the shutter stays open when you push the button is usually measured in fractions of a second (ie 1/1000 is much faster than 1/100). You can set this to be fast like 1/4000 of a second or slow like 30 seconds.
Fast shutter speeds are useful for freezing action like a performer jumping through the air. However, because the shutter stays open for such a short time it does not allow much light to enter the aperture and hit the cameras image sensor.
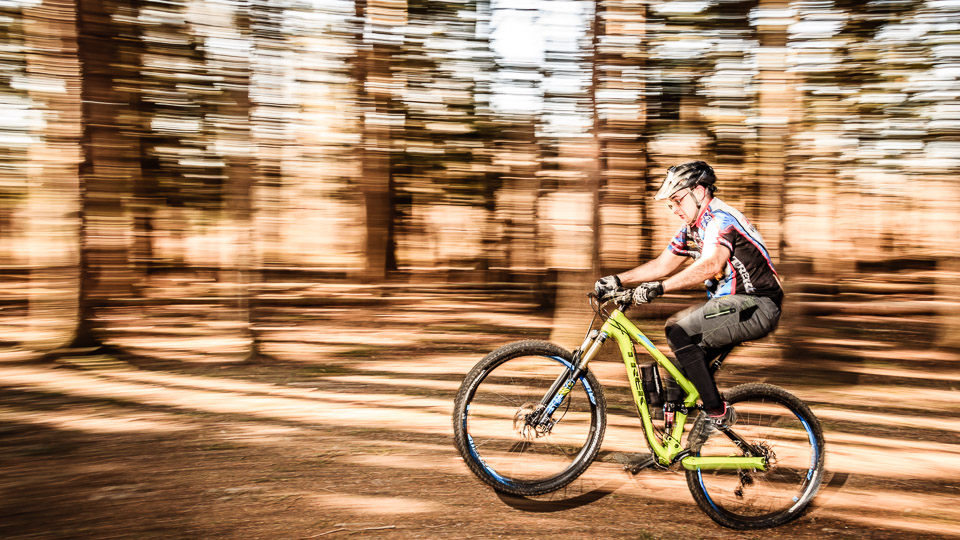
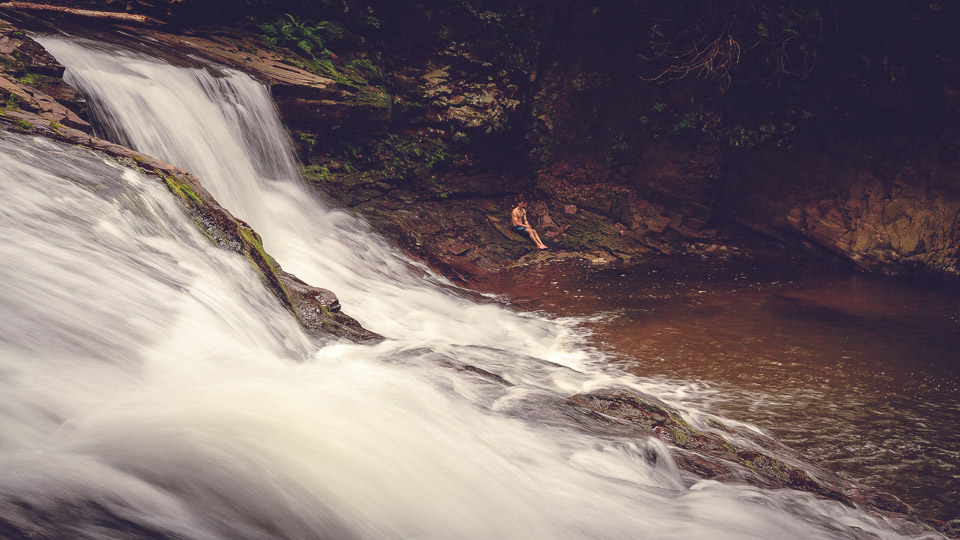
Using a slow shutter will allow more light as the shutter stays open longer but will also result in motion blur if your subject is moving. This is because you are recording the image over a longer period of time. Sometimes blur is the desired effect and only you as the photographer can ultimately decide what you are trying to achieve.

Handheld
When you hold your camera in your hands you will have camera shake unless you are superhuman and can hold it completely still. The amount of camera shake will vary with the individual, technique, etc. The result will be a blurry photo if you set your shutter speed too slow.
The general rule of thumb states that you should never set the shutter speed lower than the focal length of the lens you’re shooting with. That is to say, if you are shooting handheld with a 50mm lens, you should never set the shutter speed below 1/50. Note, however, most entry to intermediate level DSLR cameras are not full frame and have a crop factor, which means you need to multiply your focal length to get the correct shutter speed.
Example: On my Canon 60D there is a crop factor of 1.6. When shooting with a 50mm lens I need to multiply 50 x 1.6 = 80. Therefore, I should never shoot handheld below 1/80. Again, this is a general rule and if your lens has Image Stabilization, you will be able to go a little lower. Also, good technique and steady hands can make a difference. I do not have steady hands so for me; I try to stay at or above 1/100.
Moving Subject
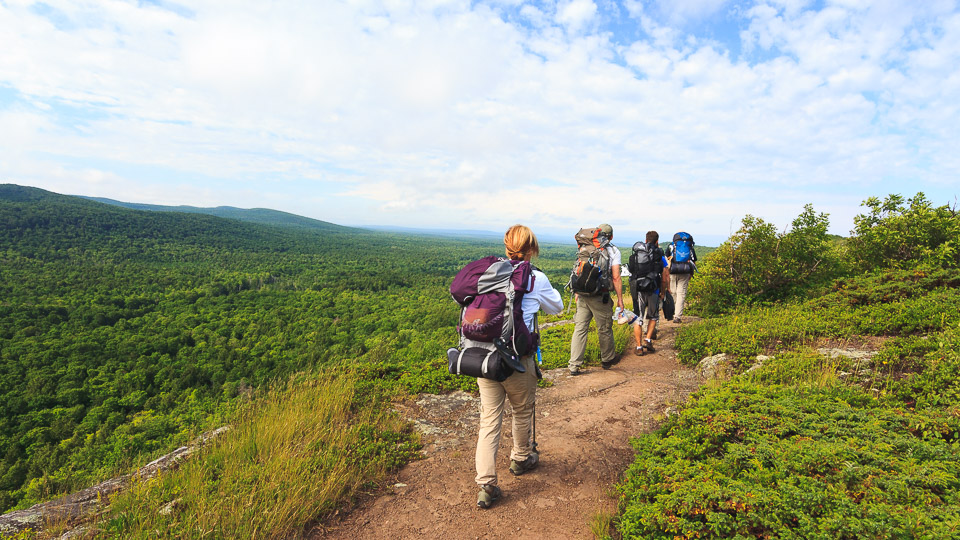
If your subject is moving, the rules change again. You need to account for that and shutter speed is the variable you need to consider. Generally, 1/125 to 1/250 is adequate for walking and scenes with some movement.
If your subject is running, you will need to go higher, like 1/250 to 1/500. If you are shooting sports, you might even go higher like 1/1000. Still, don’t be afraid to experiment. A lower shutter speed can create motion blur and give your photo a feeling of movement.
Tripods
If you are using a slow shutter speed, you are going to want to consider a tripod. This is especially true if you are into landscape photography. You’re also going to want to consider a remote shutter release so you don’t introduce movement when touching your camera.
My photography improved 20% when I started using a tripod as it gives you the ability to take photos with very slow shutter speeds. Using a tripod will also make you start to think outside the box and use your creativity. You start to think differently and wonder what would happen if you did this or tried that.
Like, what would happen if you took your camera down to that old neat cobblestone street at night? You know, the one with the cool streetlights glistening off the damp streets from the rain that just moved through.
What if you tried an Aperture like f/11 and a low ISO number like 100 making your camera rely on shutter speed to gather enough light for proper exposure. Maybe you capture the scene with a shutter speed of 5 seconds, 10 seconds, or 30 seconds. Just experiment!
Note: Your camera will likely limit you to 30 seconds in manual mode. If you go to Bulb Mode you can record an image for way longer. You will definitely need a remote shutter release. Also, really long exposures will introduce more noise. However, the question remains, what would happen, what would that look like?
Shutter Speed Tags for your thinking: Controls Light, Blur, Freeze Action.
Aperture
Once the Shutter opens, how big is the Aperture in which the light will pass? We express Aperture in terms of f-stops, e.g. f5.6 or f/5.6. The smaller the f-stop number the larger the aperture. For example, f/1.8 is a very large Aperture or opening. It would allow significantly more light into the camera than say, f/16.
However, just like Shutter Speed and its relationship to blur, Aperture controls another factor when deciding the image we want to create. We refer to this as the Depth of Field (DOF).
Depth of Field
Depth of Field controls exactly what falls into the focal plane when creating your image. A large aperture (small f/number) creates a very shallow DOF while a narrow aperture (large f/number) creates a much greater DOF.
This means if you want pretty much everything in focus you want to use a narrow aperture like f/11. This would be useful if you want your subject in focus but the castle behind them is important too.
If you are trying to isolate your subject from the background then you would use a much larger aperture like f/2.8. All lenses have a min and max f/stop they can achieve so your creativity is going to be limited by the glass on your camera.
Camera to Subject Distance affects DOF as well. Depth of Field increases with distance. The further away the camera is from your subject, the greater the depth of field.
For landscapes, you generally have a large depth as long as you are not trying to focus on something close.
For macro photography, you end up working with a very shallow depth of field because the subject is a lot closer to the lens.
If you are a numbers person or just want to see how distance, lens focal length, and aperture effect Depth of Field here is an Online Depth of Field Calculator.
What Aperture to Use?
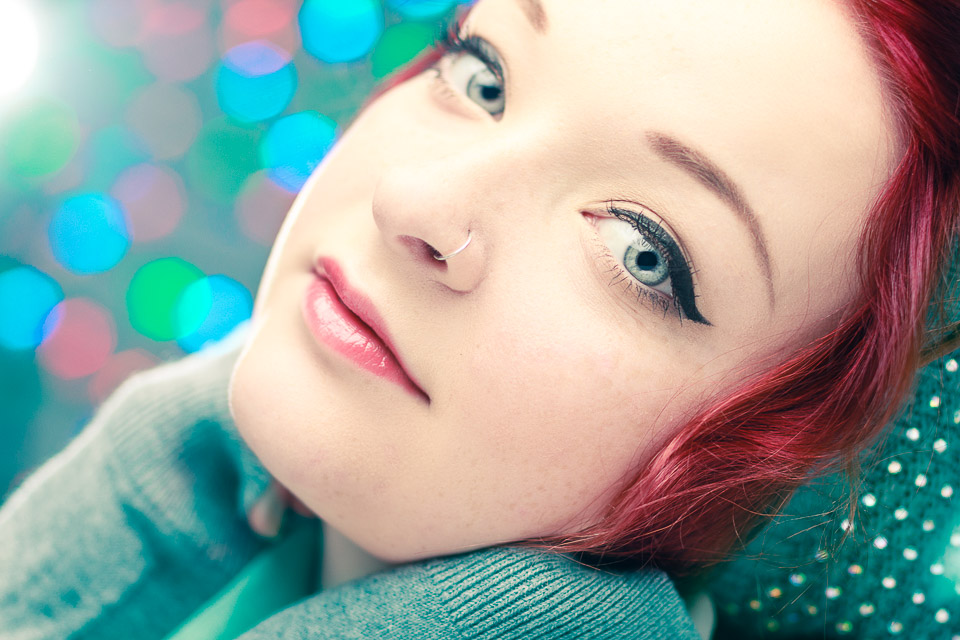
With this information, you can conclude that a large aperture (small f/stop like f/1.4) would be great for low light situations. However, you must remember, it also creates a very shallow depth of field, especially when you are close to your subject!
For instance, take the photo below. The eyes closest to the camera is in the focal plane, the far eye is clearly not. Of course, this may be what you want, it’s up to you as a photographer and artist to take control of your images and express them in the way you had intended.
Going back to our jumping performer, let’s say she is part of a dimly lit theatre performance. We may want to use a large aperture (small f/number) to allow more light to hit the cameras image sensor.
Most likely, the performer is far away so even though we are using a large aperture (small f/number) we will be fine and get most, if not all, of our performer in focus. We know this because we learned that Depth of Field increases with distance.
By using a large aperture we can now set our shutter speed a little higher, therefore, avoiding camera shake and motion blur. If we attempted to drag the shutter, our moving performer would be a blur. Still, we might need some extra help in a dark theater. We might need the last resort, ISO.
Aperture Tags for your Thinking: Controls Light, Depth of Field (DOF).
ISO
Our final stop in the Exposure Triangle is ISO or ISO Speed. In traditional film photography, ISO Speed was a measure of how sensitive the film was to light. You remember the numbers right…100, 200, 400, etc.? Well, you will be happy to know it’s much the same with Digital Photography. ISO measures the sensitivity of the cameras image sensor to light.
Lower ISO numbers like 100 or 200 are a lot less sensitive to light than higher numbers like 1000. Sounds great right? If you need more light, you can just bump up the ISO to around 3200 and set your shutter speed fast enough to avoid motion blur and your aperture narrow enough to get the full scene in crisp clear focus. Wait, not so fast!
Noise or Grain
Just as Shutter Speed introduces Blur and Aperture controls DOF, ISO has its own fun companion called noise. Noise is that grainy look you see in photos. It’s especially apparent in the shadows.
Low ISO numbers will make you need more light by adjusting your Shutter Speed and Aperture accordingly, but will also result in cleaner looking photographs.
Higher ISO numbers will allow you to take photos in dim lighting conditions, but you will start to notice noise or grain in your photos. The higher the ISO number the more grain! Look at the concert image below, ISO 2000. It looks fine but if you view the image full size at 100% (1:1 in Lightroom) you can see the grain (right photo.)
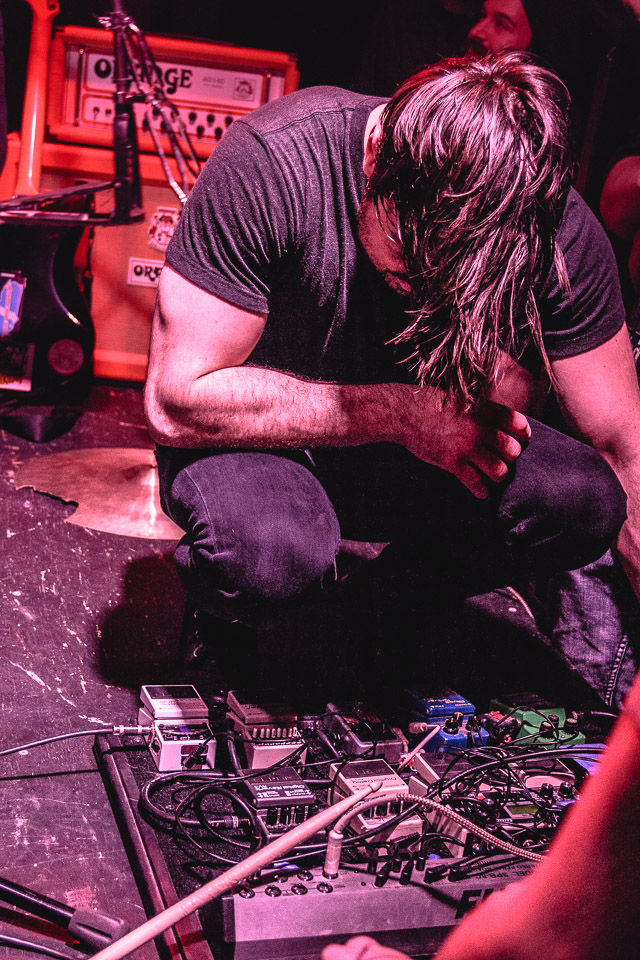
Again, it’s up to you as the photographer to decide if noise looks good in your photo, sometimes it does! Sometimes it doesn’t matter. If you don’t bump the ISO you aren’t getting the shot. Plus you can always use noise reduction in lightroom to help reduce noise. In the photo below I took the same image and ran it at 25 luminance noise reduction. See the difference.


Remember the Performer
In our example of the performer in low light conditions, my thinking would end here. I’ve already set the Shutter Speed high enough to control motion blur or camera shake, I can’t get any more light here. I’ve set the aperture to the lowest number my lens will allow, I can’t get any more light here. If I still need more light I need to bump up the ISO.
I could also just set my ISO to auto leaving my shutter speed and aperture fixed to my liking and allowing the camera to adjust the ISO as the lighting changes to create a proper exposure. I will do this sometimes if I think the lighting will change fast like at a concert with strobe lights. Results are mixed and ultimately, I like to control everything when I can.
ISO Tags For your Thinking: Controls Light, Noise/Grain
Putting it all Together
So it should be obvious your camera can’t make all these decisions for you or make them accurately. Your camera does not know if your subject is moving, a still landscape, how the scene is lit, etc. Most Importantly, it doesn’t know your artistic vision and what you are trying to achieve. Yes, it makes a calculated guess and for some situations, it works but sometimes you need to take control.
In the example above with the performer and you in the audience, your camera would most likely try to tell you that you need some flash and up pops the flash. Guess what, the flash is not going to reach! It’s going to fall short, throw the performer into darkness and you will end up with a shot of heads from audience members in front of you.
The sooner you take control of each and every shot the more comfortable you will become with the dreaded “Manual” mode on your camera. You will begin to understand the relationship between Shutter Speed, Aperture and ISO and how you can utilize them to control the available light at any location.
If you are to frightened to jump straight to manual mode try aperture priority first and then try shutter priority. In these modes, you pick one variable while the camera chooses the proper counterpart setting to obtain a proper exposure. Note what the camera is doing while you are shooting, what is it picking and why? So what are you waiting for, get out there and start shooting!


[…] Now, if you don’t have a firm understanding of shutter speed, aperture, and ISO then you should probably start there. Together, these three variables constitute the exposure triangle. The exposure triangle is a topic in its own right and goes way beyond the scope of this post. I suggest you review my other post, Camera Settings and the Exposure Triangle. […]
[…] The exposure triangle is the three variables that constitute camera settings and controls the amount of light entering you’re lens and traveling to the camera sensor. For more on that you can read this post, What is the Exposure Triangle in Photography? […]
[…] Do you feel like the Exposure Triangle is more like the Bermuda Triangle? Feeling Lost, definitely check out my in-depth guide to the exposure triangle. What is the Exposure Triangle in Photography? […]